Here's a little Photoshop trick that I occasionally find very handy.
Suppose you've got two or more photos of a given thing, none of which are properly lit. The right side is nicely illuminated in Photo One, but the left side is too dark. And the left side's OK in Photo Two, but in that one the right side is too dark.
You don't want to, or physically can't, go back and photograph the thing again.
Or perhaps the light there is never going to be any good, for reasons of geography, geometry or just the fact that you can't afford six flashes.
I ran into this just now when I was taking pictures of a ludicrously cheap network storage box I'll be writing a bit about shortly.
UPDATE: I've written the review now; it's here.
(In brief: It's a Noontec N5, and m'verygoodfriends at Aus PC Market are selling it for only $AU25 if you buy it along with a drive. And no, the drives are not overpriced to compensate. So all this thing is going to have to do to get a good review from me is, one, function, and, two, not send death threats to Barack Obama with my signature on them.)
One of my pictures of the shiny white box - which, of course, immediately tractor-beamed some cat fluff onto itself - looked like this:
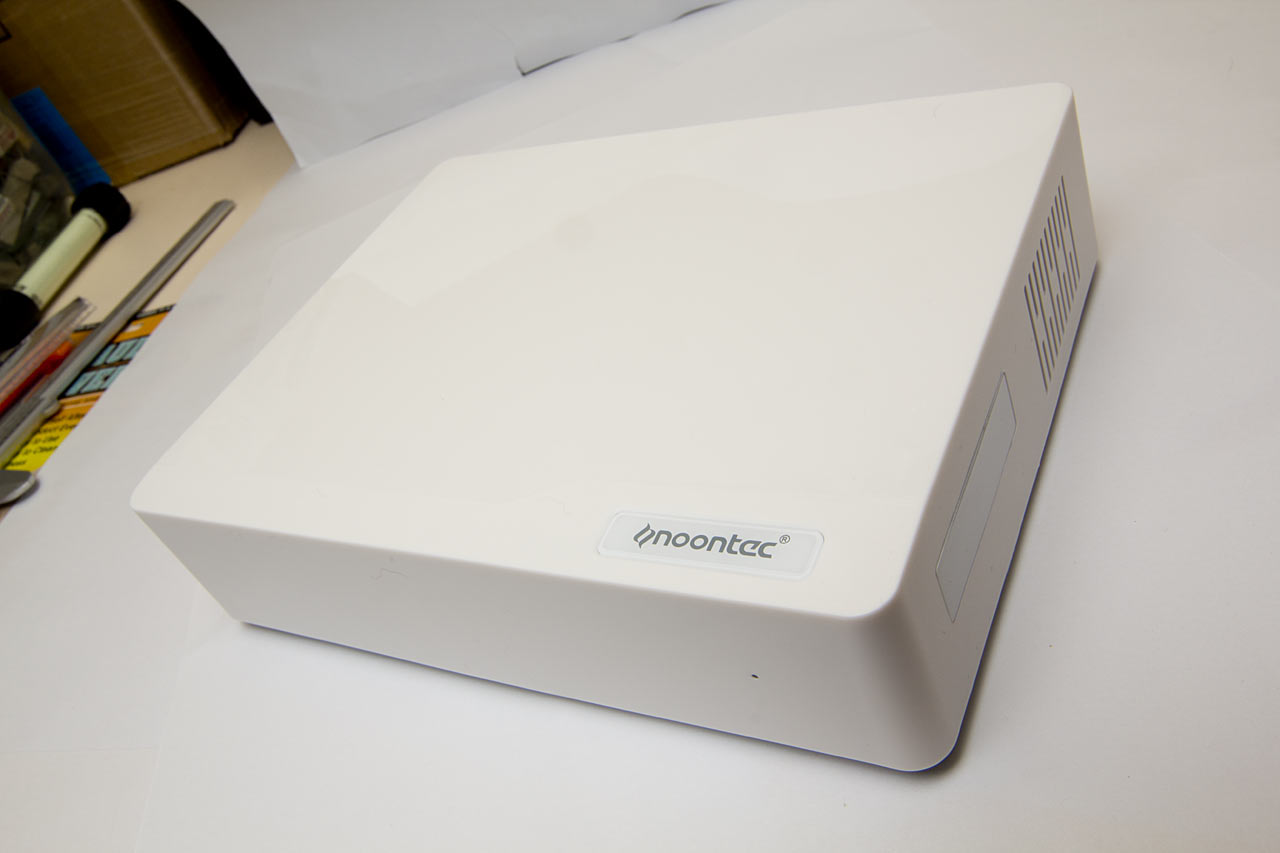
Right side too dark.
Another looked like this:
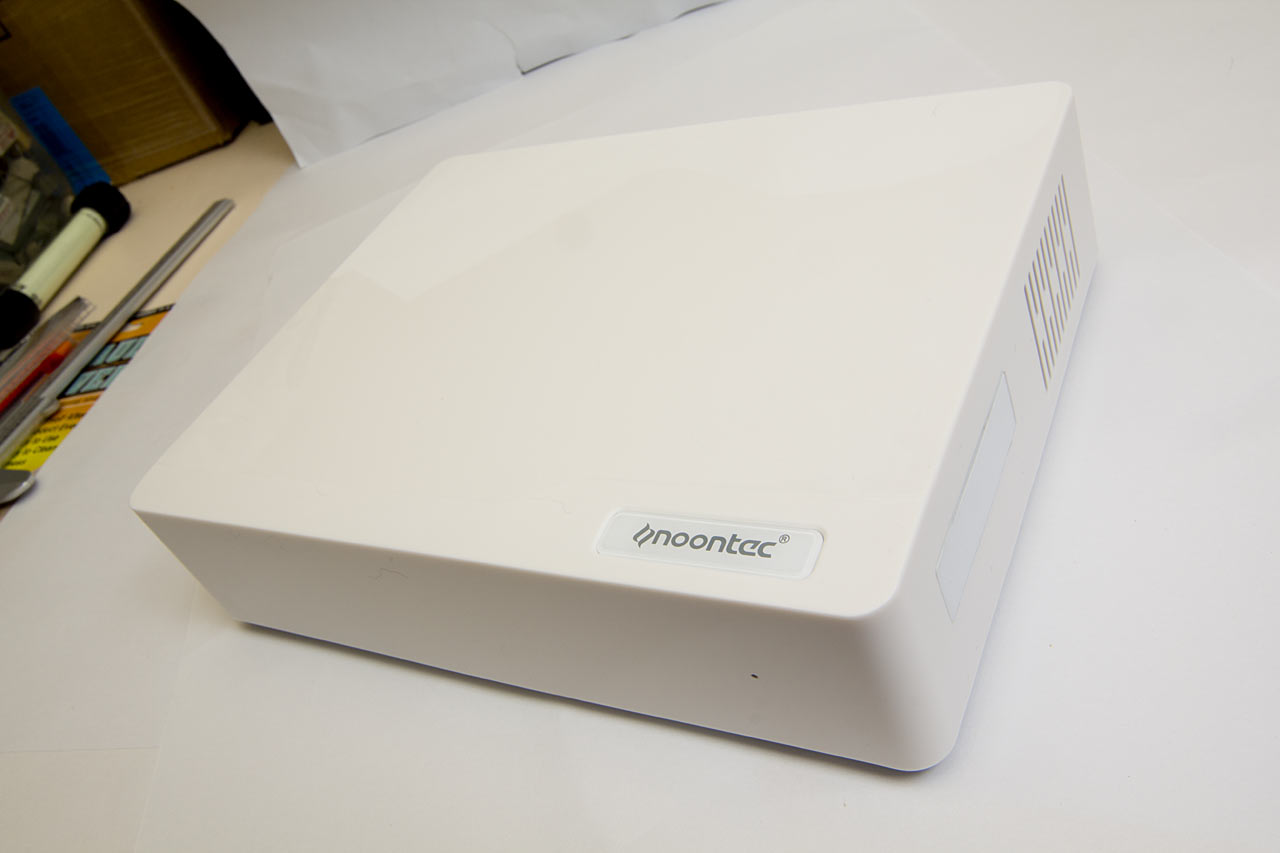
This time the front was too dark.
I could have reshot the image easily enough, but the Photoshop fix is faster. It's easy, too, as long as the images are pretty much identical except for the lighting. I'll talk about how to do it in Photoshop, but any imaging program with some equivalent of Photoshop's layers and blend modes can do it.
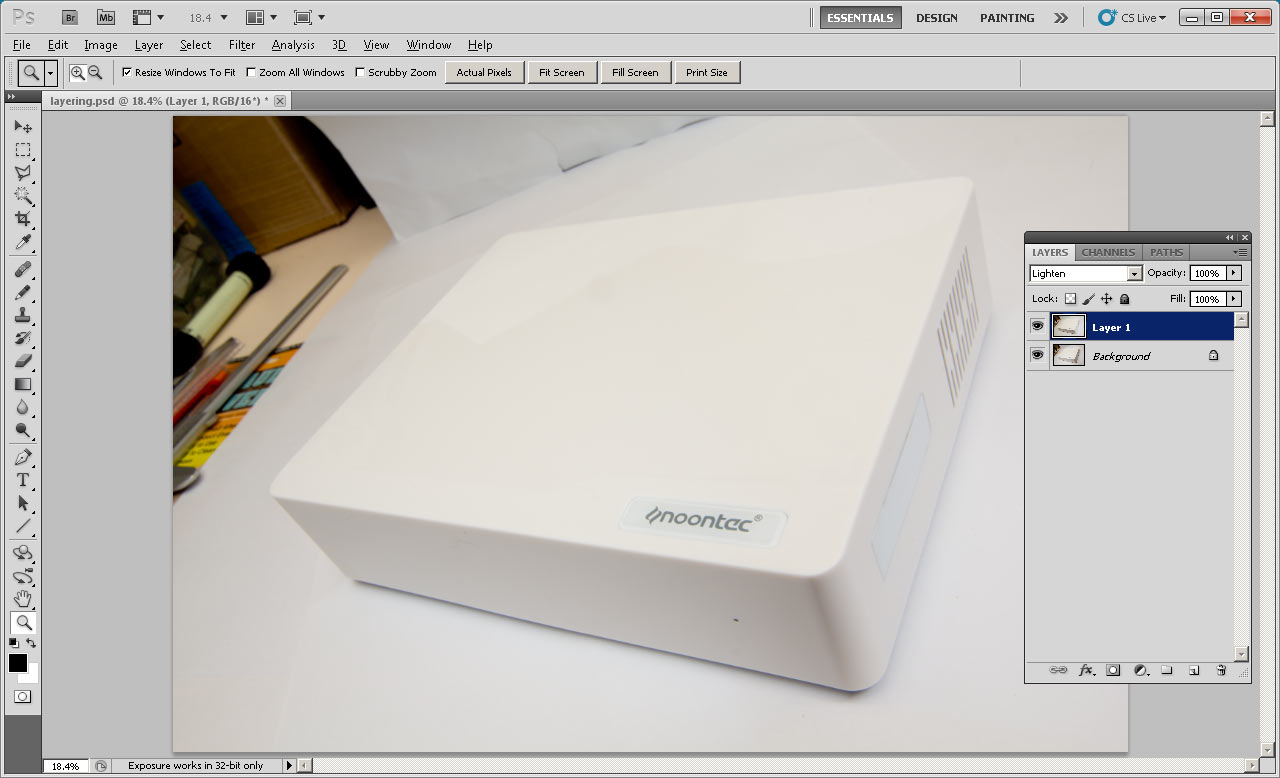
First, paste one image over the other, and set the opacity of the top image's layer to 50% or something, so you can see through it to line the two images up exactly.
(Lousiness of alignment exaggerated for illustrative purposes.)
You may not need to do this at all, but even when you're shooting with a tripod, it's common for successive images to be misaligned by a pixel or two. It may be impossible to perfectly align the images if they're off by some fraction of a pixel, or if perspective means they're off by different amounts in different locations. Just try to get the important parts of the overlapping image combination to look as sharp as possible.
Now, set the opacity of the top image back to 100%, and set its blend mode to "lighten".
And you're done!
"Lighten" simply makes any pixel in the top layer opaque if, and only if, it's brighter than pixels in lower layers. So if you're combining images of the same object lit in different ways, you get a result that looks as if everything that illuminated the object in all of the images was illuminating it for just one photo.
I seldom set out to use this technique, but it's definitely not just a bad-photo-salvaging trick. If all you've got is one flash, for instance, you could take a string of pictures with the flash aimed and reflected and diffused in different ways, and then combine some or all of them to get the same effect as a bunch of simultaneous flashes, or a beauty-dish reflector, or a big studio flash with a large soft box, or J.J. Abrams and his Travelling Lens-Flare Circus.
You could also use this technique on video frames, sequential light-painting photos, and perhaps for astrophotography too. Any series of images you can shift and warp to pretty much line up with each other will work.
You could even use it to vanish dirt, dust or even insects on a thing you're photographing but can't properly clean. Take a shot, blow the dust around a bit, take another, combine with Lighten if the dust is darker than the object or with Darken if it's lighter.
(Even more complex blend-mode tricks involving lighting of different colours also suggest themselves.)
13 February 2013 at 6:05 pm
The rounded front corner is too dark.
Also, too much cat fur, not enuff actual cats.
14 February 2013 at 12:28 pm
Yeah, it's still not perfect. I was using a very wide lens to make this featureless white box look a bit more interesting, so the lens's non-removable hood was practically touching the the front of the thing and shaded it a bit.
Close enough for government work, though!
EDIT: You know what? I've only taken one other picture for the review so far, so I hereby pledge to do the rest with an 8mm fisheye.
14 February 2013 at 8:07 am
So uh...when's the review coming? I'm looking for a cheap NAS enclosure, and the usual big names are several times the price.
14 February 2013 at 7:50 pm
Personally, I'm holding off on NAS until I sort out a media player.
To be fair, maybe my setup isn't common: a HDMI projector and an old Sony amp with TOSLINK input. So far, I've been through a couple of media players (WDTV) and they have had trouble seeing the files shared from my home PC.
Optus just sent me a meTV box- junk, unable to play local media content.
I'll be looking at the Android based media players next.
Sure, Dan, tell us how to store our movies cheaply and easily - but some advice on how best to play them would be nice, too.
14 February 2013 at 9:58 pm
Hmm, I happened to buy myself an Android based computer-on-a-stick-with-an-HDMI-on-the-end called the Rikomagic mk802II not too long ago. Built-in wifi, 4GB flash, 1GB RAM, but needed to add a keyboard and mouse (and HDTV, it doesn't work with a normal computer monitor through a HDMI to DVI connector, I've tried). Pretty good little machine. Plays 1080p without major problems. The newer version (the mk802III) is much more powerful (dual core and all) but at the same price. I'm REALLY tempted...
Once in a while the output blinks once, and some android apps don't work (just the usual android problems; this game requires graphics chip X or driver Y... annoying) but those are really the biggest annoyances. One of those that does not work is the XBMC media server, that is for a technical reason (doesn't work on Allwinner A10 powered devices).
Through adding a better file manager I have access to a hard drive connected to my router (USB connected to an Apple Airport Extreme, but should work identically for any correctly configured NAS
box) and have access to everything. And Netflix is installed. Bliss! All for the princely sum of around U$70, delivered from China (aliexpress!).
I'm not a paid shill
8 March 2013 at 11:21 pm
Just read the review, and since I can't comment over there, I thought I'd comment here.
I bought one of these after seeing this blog post, and it is an absolute bargain, no doubt about that. As a NAS, it is absolutely fine. Obviously you can't have fancy things like RAID or redundancy, but as a backup/storage device, it's great.
However! As a DLNA server, it is quite lacking. There is virtually zero configuration options for the media server. The media server does not serve nested folders. So for example, my TV shows are sorted by [Series Name] -> [Series Number] -> Files. The Noontec drops the [Series Name] folder and just shows me series number, which in my context is utterly meaningless. You could, of course, just name your folders [Series Name & Number] but that seemed like too much work to me. If you just wanted to throw a heap of movies on there though, it would be fine.
It also has a really odd way of doing thumbnails - my windows machines decided that they couldn't play directly off the server, and instead wanted to download a file. It was quite strange. Using Windows Media Player however worked fine and I was able to watch like I would off another Windows PC. My android tablet was perfectly happy with it, and it was capable of streaming me mpgs, mkvs, divx all without hiccups.
I haven't tested it with Xbox or PS3, but I have no reason to think it wouldn't work adequately with them.
For my needs, it is inadequate as a media server. However, I am going to continue to use the Noontec as a network backup device, for which it functions flawlessly.
And it really is a ridiculously cheap price. It is virtually throw-away money, try it, it may work great for you and be all the NAS you ever need!
14 February 2013 at 9:22 am
How would the usual HDR processing differ in the final result?
18 February 2013 at 8:39 am
You might want to try out the alignment and blending droplet batch files available with Hugin http://hugin.sourceforge.net/ - or get more involved with the alignment http://wiki.panotools.org/Align_image_stack and blending tools http://wiki.panotools.org/Enfuse - the defaults will probably prioritise your darker faces rather than the lighter ones. You need to check permissions on the bin folder or install outside the Program Files folder to have correct operation of the batch file shortcuts.
2 March 2013 at 8:49 am
There is indeed a version of this trick you can use for astrophotography - it sits somewhere between lucky imaging and real adaptive optics. If you take a video of a patch of sky, you can watch the stars jiggle around and get fuzzier and sharper. Lucky imaging just keeps the sharpest ones. Using a trick like this to align them helps a lot. Real adaptive optics starts with moving a mirror in real time to remove the jiggle; if you're really good you can even deform the mirror on the fly to sharpen the image. The big problem with all of this is that if your target was bright enough to let you align your frames, why would you take a long exposure in the first place? So you need a much brighter star nearby ( but not too nearby! ). Or, failing that, there are always Giant Space Lasers.