When cat toys are outlawed, only outlaws will have cat toys

A reader writes:

I've got a couple of cats, had 'em for a couple of years. I have trouble motivating them to chase their toys, ping pong balls, etc - it works once or twice a week, but otherwise they just ignore it. So I've decided to bring out the big guns and get a laser pointer.

It seems they're much harder to get in Australia since all those airplane shenanigans, even though I hardly need a galactic-range pointer.

Was wondering if you had a suggestions for where to nab a laser pointer appropriate for kitteh?

Jack

It's still pretty easy to buy your basic button-cell keychain laser pointer from electronics stores here in Australia. I think there might have been a brief drought when the new Think Of The Children Or The Pilots Or the Puppies Or Something OMG JUST BE AFRAID EVERYONE law was passed, while the stores made sure that the humble cat toys they were selling yesterday hadn't suddenly been transmuted into illegal death rays.

But basic laser pointers are easy to find now. Here's one at Altronics, here's one at Jaycar (Jaycar have several other options, too).

[There are cheaper pointers on eBay, from sellers who at least say they're in Australia, which means they shouldn't be sending your purchase through Australian Customs to be confiscated by our ever-vigilant protectors. People may still be selling cheap pointers at the markets, too. If you believe price equals quality, on the other hand, note that the writhing transporter-accident creature that absorbed both Dick Smith Electronics and Tandy (Radio Shack) in Australia will be pleased to sell you a keychain pointer for $36.98 - at "DSE" here and at "Tandy" here!]

Altronics and Jaycar both want $AU14.95 for a bloody keychain pointer, which is of course a frankly insulting price. For little more than twice that much at current exchange rates a nice man in China will sell you a whole non-contact infrared thermometer, that incorporates an aiming laser. But which I'm sure will whistle through Australian Customs, just like all of the "laser-guided" circular saws, ultrasonic distance measurers, scissors, et cetera.

I chose not to choose a $15 keychain laser. I chose something else.

Home-made laser pointer

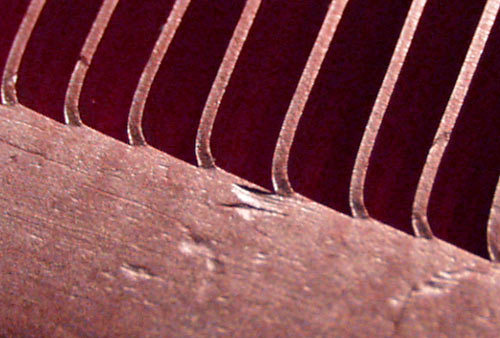
This prison-shiv of a laser pointer...

Home-made laser pointer

...took a lot longer to photograph than it did to make.

It's pleasingly bright at around 25mA current - much brighter than your standard button-cell cheapie, but not bright enough to pose any real eye hazard. It has an egg-like shape that feels good in the right hand, with a nice clicky steel switch-bar under the thumb. It has adjustable focus, so you can widen the light out into a splodge of quantum speckle at will. And it had a total parts cost about the same as the abovementioned stupidly-expensive keychain lasers. You could easily make something similar for less than $10, including the two AA batteries.

(It's quite hard to find laser pointers that take AA batteries, these days. Those little button-cell pointers are churned out by the zillion, and many pen-shaped pointers use a couple of AAAs - but if you want the substantially higher capacity-per-dollar of AA power, I think you may have to assemble your own pointer. Or, at least, hack bigger batteries onto a smaller pointer.)

The key component in a do-it-yourself laser pointer is a laser diode, lens and heat-sink assembly - commonly referred to as a laser "module", or "package".

Well, that's the key component unless your DIY ethic requires you to build the module from scratch, as well.

(The state of the DIY art has not, to my knowledge, yet reached actual home-made laser diodes. It's surprisingly easy to make your own very dim LED, though!)

There's no financial reason to build your own laser module, because you can buy ready-built modules in various shapes and sizes - even in colours other than red - startlingly inexpensively on eBay, or from dealers like DealExtreme. And no, Australian Customs won't confiscate your laser module, either - or, at least, they didn't confiscate any of mine.

Because, like an IR thermometer, a laser module is demonstrably not a laser pointer. And it is laser pointers that are illegal here, don't you know.

(I haven't tried importing a genuinely dangerous high-powered laser module, of the type used in hefty laser "pointers" that were already illegal in Australia before the current ridiculous laws went through. I would make a small wager that you would have no trouble importing such a module at all, though. But don't worry - as we all know, those scary domestic terrorists who we keep being warned about, but who mysteriously never seem to actually commit any acts of terrorism, must be so impotent on account of how they are too dumb to figure out how to connect a multi-watt invisible-beam IR laser module - you know, a laser that's actually dangerous - to a battery.

Ahem.

The question for the non-terroristic cat-toy maker is which of the (very) numerous cheap red laser modules will actually suit your purpose. I am happy to announce that I've done the legwork for you, here, for DealExtreme's range at least. I bought a few of their finest, cheapest red laser modules, and this one, yours for a princely four US dollars and six cents delivered to anywhere in the world, is the one you want.

It's got a nice big sturdy heat-sinking case, it's usefully, though not dangerously, bright from modest power, and it's got the abovementioned adjustable collimating lens, too.

The other components of a DIY laser pointer:

1: Batteries. Two AA alkalines, in this case; feel free to use some other combination if you like. (Three D cells would give you outrageously long run time.)

The batteries you choose determine which...

2: ...resistor you should use in series with the laser module.

Laser diodes, like their older relatives, the LEDs, need some kind of current limiting to prevent them from going into thermal runaway and dying very quickly. Inline resistors are usually the simplest option.

I found that the four-dollar DealExtreme module ran nicely, but not excessively, brightly from two AAs through three 91-ohm resistors in parallel, for an aggregate 30.3 ohms. I couldn't find a roughly-30-ohm resistor for the final assembly, so I used a couple of 16s in series. Small laser diodes draw only tens of milliamps, so little quarter-watt resistors are more than good enough.

If you buy some other laser module, don't just trust the "2-4.5V" or whatever that was listed on the eBay auction, hook it up to two AAs, and kill it. You'll need to put a multimeter in milliamps mode - which, remember, has a little resistance of its own - in series with the module and fiddle with batteries and, initially, larger resistance values, to find a suitable value. (That's how I ended up with three 91s in parallel - I started with one 91-ohm, which gave a very dim beam, then put another one in parallel, et cetera.)

The quick and dirty way to figure this stuff out for a laser module of unknown provenance is by starting with resistor values that're clearly much too high - by themselves, across the power supply, they'll let much less than the module's rated current flow - or by using a bench power supply that lets you limit voltage and current. Then you reduce the resistor value (or gingerly wind up the current knob) until the dot stops getting noticeably brighter. Wind it back a bit from that point and you should have a safe value. Or just stop when the dot's still getting brighter with more current, if it's already bright enough for your purpose.

Or you can, of course, sidestep all of this and just buy that DX module, and run it from two series 1.5-volt cells and about 30 ohms.

3: A battery holder. Little black plastic holders like the one I used are almost free on eBay, or you can bodge something up yourself. (Thumb-tacks make good battery contacts, by the way.)

4: A switch. I used a microswitch I had sitting around, which gives a pleasing tactile feel. Any old switch will do, though. Momentary, like my microswitch, if you want the usual hold-down-the-button kind of laser pointer, or standard "unbiased" if you want a pointer that stays on by itself.

(For about the same almost-free price as a black plastic AA-battery holders, you can get a black plastic AA-battery holder with an unbiased switch built in.)

5: Stuff to hold it all together. Solder and glue, for a more professional result; tape and positive thoughts, for a less professional one.

The weird organic-looking white stuff on my pointer is a couple of blobs of polycaprolactone plastic, about which I must digress, because it's brilliant stuff.

At room temperature, polycaprolactone is a tough white plastic, like nylon. But above about 60°C it becomes a pliable, bouncy, transparent putty-like material.

Polycaprolactone is transparent when it's hot

(This is the laser assembly before the second blob of polycaprolactone had fully cooled. It'd be fun if it stayed like that, but you can't have everything.)

You take polycaprolactone granules, and you put them in boiling water, and they turn clear and stick to each other. Just stirring the growing blob around a bit will pick up any loose pellets. Then you fish the spongy blob out and squeeze the hot water out (a slightly painful procedure), and then form the blob to suit your task, usually by just sticking it onto something and squeezing it into shape. Hot polycaprolactone sticks well to all sorts of surfaces, but not so well that you can't peel it off if you make a mistake. And you won't get scalded while doing this, because unlike water, the plastic is lousy at transferring heat to your fingers.

(If you heat polycaprolactone above 100°C, by, for instance, microwaving it instead of putting it in water, it apparently becomes a lot stickier, as well as much more able to burn you. So you might want to leave those higher temperatures to the rapid fabricators. I needed to smooth a little bit of my polycaprolactone blobs, so I wafted a small butane flame past the plastic. But then I smoothed it over with a damp screwdriver, instead of my finger.)

As polycaprolactone cools, it clouds up and stiffens, but does not appreciably shrink. If you haven't gotten your new plastic part shaped right before this happens, just pop it back in the water to re-soften. It's easier to re-shape polycaprolactone than it is to shape it in the first place, because there's less water to squeeze out. You can re-heat the plastic as many times as you like, too, and any excess can go back in the bag for later.

Polycaprolactone in the molecular weights that make it behave in this useful way is manufactured in vast quantities by at least two companies, Solvay and Dow Chemical. Which is great to know if you need a ton of the stuff, but not so much if you just want to replace a missing knob on a radio. (That was my first polycaprolactone project. It worked beautifully.)

Other companies repackage polycaprolactone in smaller quantities at large markups. "Polymorph", "ShapeLock" and "Friendly Plastic" are all polycaprolactone. The first two are very much the same; Friendly Plastic comes in a white-pellets version too, but is also available in a wide range of more-expensive coloured versions. You can colour polycaprolactone yourself, but if you need even, repeatable hues and/or metallic effects, and you don't need a huge amount of the stuff, then you'd probably do better just buying Friendly Plastic.

(The bone-white version is of course preferable, if you want to make creepy biomechanical thingummies.)

If you're in Australia and you just want to see what polycaprolactone is like, get yourself a hundred grams of "Polymorph" from Jaycar for $AU11.50. (Plus delivery, if you buy it online rather than over the counter.) That may go a surprisingly long way; I didn't weigh the Polymorph that went into my laser pointer, but judging by volume it was probably no more than 25 grams.

If you're in the States, there are lots of retail polycaprolactone sources. Try the Maker Shed.

If you're outside the States and want a larger, but not vast, amount of the stuff, many companies stand ready to rip you off.

You can place an international order at Shapelock.com and pay for it, with a pleasingly low shipping fee - and then they'll refund your money, because they don't actually ship overseas. And then they'll tell you to order from Jameco instead. Jameco's international shipping fees aren't mentioned on their site; you can place an order and give your payment info and wait for the delightful surprise, or you can e-mail them, whereupon they will inform you that their cheapest price to send a $US24.95 half-kilo of Shapelock to Australia is $US39.

Sorry. Just had to get that out of my system.

OK, here's how people outside the States - and possibly inside, actually, depending on how all the prices shake out - can buy polycaprolactone at a non-stupid price. Go to this eBay dealer in the UK (on ebay.com, on ebay.co.uk), who's currently on holiday until the 8th and has invisibilised their auctions, but will actually still let you place an order via this listing. They'll sell you 500 grams of Polymorph-branded polycaprolactone for £9.50 plus quite reasonable delivery, with a microscopic discount for multiple half-kilos.

[UPDATE: As pointed out in the comments below, that eBay dealer has a separate Web site too, from which you can download a great PDF about what you can do with Polymorph.]

To make sure I get my order in before all of y'all, I just ordered a key, man, for a total of £32.75 delivered to Australia. That's about $AU54.20, or $US49.80, as I write this.

A kilogram of polycaprolactone is quite a lot - especially when you consider the near-infinite reuseability of the stuff. Unless I suddenly start building sizeable structures, I don't anticipate having to buy any more for some years.

Jaycar offer discounts for bulk purchase, but a kilogram of Polymorph from them is still $AU89.50 ex delivery. So the eBayer in the UK looks like a good deal.

Hm. This post started out being about making a laser, and ended up about making freeform plastic bones. Eh - it'll do.

Do feel free to discuss either subject in the comments!

Does YOUR hamster have The Right Stuff?

When I read that Neil Fraser's Meccano lava-lamp centrifuge only rotated at 42 revolutions per minute, I didn't think it sounded very impressive.

I take that back.

If only Formula 1 knew about duct tape and baling wire

Just as not everything that appears on Photoshop Disasters is an actual Photoshop disaster, and not everything on The Daily WTF is uncontroversially WTF-y, so too not everything on There, I Fixed It is actually a half-assed repair job.

Free Wheel Chair Mission wheelchairs

These wheelchairs, for instance, may look gimcrack, but (as commenters quickly pointed out) they're actually real, functional and sorely-needed "appropriate technology".

(If it's stupid but it works, it isn't stupid.)

I think quite a lot of the other There, I Fixed It posts have a similar charm, especially to people like me who actively prefer shabby things to shiny ones. (I am not being sarcastic when I say cat-scratches "improve" furniture.) I like things that look totally ramshackle, or even obviously broken, but actually work, or can pretty easily be made to work.

Stacked-paper desk support

This desk support, for instance, rather appeals to me.

You could make it properly structurally sound, too. Just gather enough unimportant documents - not, I think you'll find, a difficult task for many people - and pile them up one sheet at a time, putting a circle of white glue on each sheet. Then put the desk or something back on top of the pile to clamp it while the glue dries.

You could make a desk that stood on four of these things, a coffee table on four short ones, a single one as a display plinth for your Office Space collectibles...

You could even make the stack lightweight, if you did something like core out the middle inside the glue-rings and replace it with a length of large-diameter PVC pipe. And then you could, of course, hide booze in it!

I invite readers to nominate their own examples of constructions and contraptions in this sort of improbable-yet-functional, broken-yet-working category.

(With pictures, if possible! Commenters can't use image tags, but if you just put the URL of the image, Flickr page or whatever in your comment I'll picturify it, provided it doesn't make my Civil Defense Lemonparty Survey Meter beep too loudly.)

Solid gold minifigs still pending

The moment I discovered that "Inanimate Reason" sell Lego-compatible components machined from aluminium, I knew I had to get at least a couple of pieces. If only to gaze upon, and sigh happily.

Pointless Lego contraption with aluminium beams

The two long beams are aluminium; the other pieces are standard Lego.

As you can see, everything fits. The holes are the right diameter and have the right little rebate around the edges; they're distinctly tighter to push pegs through than standard ABS pieces, but everything works as it should, and axles don't bind.

If you're a Lego purist, of course, then it is heresy to use "compatible" pieces of any sort - even Mega Bloks, the best of the usually-woeful Lego clones. It's a sin even worse than gluing pieces together (though probably not as bad as cutting them up). And if you're making something to enter in some sort of Lego contest, then non-Lego parts probably break the rules.

But if all you want to do is make cool things out of Lego, and you need, for instance, some long beams that won't bend as much for robot frame rails or something, these things are great.

(If you make large structures out of normal Lego, you have to use engineering skill to work around its limitations, which is a very educational exercise. Plastic in model-crane scales works not unlike steel in real-crane scales, so it takes real skill to build a huge crane or bridge (or, yes, short-lived house). Or, at least, a great deal of good old pre-scientific trial and error. But if you just want to knock together a chassis for a Lego Roomba or something, and no offensively gigantic Lego piece suits your needs, aluminium pieces are just what the doctor ordered.)

Inanimate Reason's products aren't even very expensive, by the standards of custom-machined gear. The smaller pieces only cost a few bucks each; my two 25-stud-length, 25-hole "liftarm" beams - the longest Inanimate Reason currently make - were $US11.99 each, plus a modest shipping fee.

The 25-length beams are not just stronger, but also about ten studs longer than any plastic beam Lego have ever made. I think the longest modern "studless" beam is the 15, unless you count the oddball 11-Duplo-stud-long one that came with this brilliant set. The longest old-style beam-with-studs is the 16. (And just because I know I'll get letters if I don't mention them, this very macho Scala building component is 18 studs long, and this recent bridge-frame piece is a gigantic 31 studs in length.)

Inanimate Reason have a Web shop here, and a BrickLink shop here. (Click "Show All Custom Items" for the metal parts - they sell normal Lego as well.)

Besides ordinary beams, they offer a variety of pieces in shapes and/or hole configurations that Lego don't make. You can get curved beams, beams with an even number of holes, holes with varying spacing to allow otherwise-impossible gear arrangements, beams with lockable hinges in the middle, heavy-duty shafting and gears for high-power drive applications, and adapters to let you easily use standard hobby servos in Lego machines.

(The abovementioned bizarre Early Science and Technology "Duplo Technic" line offers other possibilities for heavy-duty geartrains, but I think it's impossible to connect the chunky Duplo components to normal-sized Technic, and the sets are so rare and expensive that unless your intention is to force some Lego-robot-sumo contest to change their rules next year, you might as well buy the aluminium pieces anyway.)

Lego is already a surprisingly capable robotics prototyping system...

...but the bendiness of plastic means it can't get anywhere near the somewhat unsettling capabilities of "proper" modern robots.

Today, aluminium beams and drive components. Tomorrow, an all-stainless 8880!

(Or 928, of course.)

UPDATE: And now TechnicBricks has alerted me to the existence of Lego-compatible linear actuators, from this company. They integrate a motor and a linear actuator, come in two lengths, and work with both NXT and Power Functions.

They're expensive, though; one 100mm actuator costs as much as a whole 8294 Excavator.

Posted in Hacks, Toys. 6 Comments »

Give the (free) gift of The Secret Life of Machines!

A quick update on the subject of the Secret Life of Machines series...

From series 2, episode 1

...which, for the information of newcomers, is

1: fantastic,
2: legal to download for free, and
3: large.

A couple of years ago, I made a torrent of a high-video-quality version of this excellent science series, which total 3.3 gigabytes.

Of late there have usually only been one or two seeds for the torrent, though, and one of them is me, and my little home DSL account can only upload at a peak speed of about 25 kilobytes per second. So it takes me a couple of days to send the whole bulk of the three series to someone (technically, it's two six-episode series of The Secret Life of Machines, plus one six-episode series of The Secret Life of The Office). And when the transfer finally completes, the recipient will then usually not bloody seed it.

So if you've still got that torrent sitting in your BitTorrent client, I'd be grateful if you force-seeded it for a while.

(A reminder for readers who're dubious about this, or protection-racketeers from one or another content company who're champing at the bit to send me a nastygram: Tim Hunkin, the creator and principal presenter of this show, wants people to download it for free. He makes this clear in many places, like for example his pages for the three series of the show. The shows are still copyrighted, but free distribution is expressly permitted.)

As I've mentioned before, you can help out with seeding even if you don't have the torrent in your BitTorrent client any more, provided you still have the files. (Which, by the way, are in the "M4V" iPhone format, are not nasty VHS rips, and are playable on all platforms; use VLC if you have problems.)

To seed if you've got the files but not the torrent, just get the torrent started as if you were going to download it again (so your BitTorrent client creates the appropriate download directory and empty files), immediately stop it again, copy the video files from wherever you've put them into the new download directory over the top of the new empty files, and then restart or "Force Re-Check" the download (depending on which BitTorrent client you have). Provided the files are the right ones for this iPhone-format version of the series, and have the right names, the download will now be 100% complete and you can force-seed it for a while.

Oh, and don't worry if your BitTorrent client says the download is only something like 99.8% complete, and it has to download a bit of data before it's "finished". That just means your computer has modified some header data in one or more of the files, so that tiny bit needs to be re-downloaded to overwrite the changes. It doesn't mean the files are corrupt.

(If you don't have a BitTorrent client at all but do have the files, perhaps because someone gave them to you on a thumb drive or something, you can also help out. You just need to install a client - µTorrent, for Windows and Mac, is excellent - and then do the starting-stopping-copying-and-then-seeding thing. The default settings for a freshly-installed BitTorrent client may stop it seeding after it's uploaded 200% of the data size of a torrent, or something; upload-ratio checking goes weird when you do the stop-copy-and-seed thing, too, because you'll have the whole download but won't have actually downloaded anything. Just right-click the torrent and select "Force Start" or "Force Seed" or whatever it's called in your client, to ignore upload limits.)

Here's a magnet link for the Secret Life of Machines torrent. (You may need to associate your BitTorrent program with magnet:... links to make this work, or manually copy and paste the link into an "Open Torrent..." dialog.)

You can also download the torrent file from isoHunt or The Pirate Bay - it was on Mininova, too, but they decided to go legit the other day and removed pretty much all of their torrents, including legal ones like this.

The BitTorrent community is moving away from .torrent files, just as it's moving away from trackers - The Pirate Bay have actually shut their trackers down altogether now. If you've got the little magnet URI for the download you want - it's ?xt=urn:btih:D62CLPSEYNRN74FRZDUC5GYVKTOOUKGE for the Secret Life of Machines torrent - then your BitTorrent client can use it to get other people who're downloading the same thing to send you the data that a .torrent file would have given you. This may take a little longer than downloading a torrent file would have, but it shouldn't actually fail unless there's nobody seeding the torrent, in which case you obviously wouldn't be able to download it anyway.

Once you've got the torrent info, the distributed hash table (DHT) system that all modern BitTorrent clients support can go on to give you the rest of the data from other users, without needing a central "tracker" system to keep everything organised.

And then, before you know it, you're watching Tim stand on the accelerator and the brake at the same time, and Rex brutalising that poor innocent refrigerator.


Tim Hunkin has done a lot of stuff since The Secret Life of Machines. Here's...

Whack A Banker machine by Tim Hunkin

...some posh bird enjoying the latest in Tim's long and inimitable line of penny-arcade amusement machines, "Whack A Banker".

Just your everyday Klötzchenbeförderer

Via TechnicBricks, yet again:

This magnificent contraption is not new - the clip's from 2007, and Make noticed it in early 2008. But I think you'll agree that its creator, "superbird28", could do with some more publicity.

If you'd prefer a more compact version:

This reminded me of another Make find, just the other day:

This is a system used in real factories, to reduce the machinery needed to handle different goods, or the same goods at different stages in the manufacturing process. Note that the cylinders and the cubes don't mix.

Spinning and skiving

Herewith, two metalworking procedures that look like magic.

One: Metal spinning.

Many people are familiar with "spun metal" - you might have a salad bowl or arty lampshade made of "spun aluminium", for instance. But the actual procedure, done by hand on a normal lathe or by automatic machinery, is quite mesmerising:

There's no real upper limit to the size of the objects you can make by spinning. If your lathe can accomodate the initial piece, you can spin larger...

...or much, much larger...

...things.

Two: Skiving.

Skiving is shaving a thin layer off something. I think an ordinary woodworking plane actually more or less qualifies as a skiving tool. It's a standard procedure in leatherworking, but you can do it to metal, too, and that's where it shades over into the miraculous, if you ask me.

A metal-skiving machine doesn't just carve thin layers off a block of metal, like a plane would. In one stroke, it can cut each slice to a uniform length and leave it connected to the base, standing up parallel to all of the other slices.

And so, hey presto, you've suddenly got CPU-heat-sink fins like these!

Skived heat sink

Skived heat sink

In more detail:

Skived heat sink detail

Unfortunately, I can't find a video clip of metal skiving in progress. There's a little picture accompanying the Wikipedia article on skiving machines, but that's all. Do please tell me in the comments if you know of a clip.

Basic electronics to make your organ glow

A reader writes:

Thanks for your Embarrassingly Easy Case Mod page.

Sorry to be such a techno-dummy, but: You said that because each color-changing LED was 3V, you could connect 4 of them in series to a 12V source. So the LEDs divide the voltage between them? If that's true, how can you connect multiple AC devices to an exension cord and have each of them receive 117v?

Anyway, I'm converting an electronic theater organ to MIDI, and would like to add 20 color-changing LEDs to the console. (Thought you'd appreciate the details, eye-candy-wise.) How do you suggest I do that? If I wire them in series, what sort of DC power would I need?

I know you're a busy guy, so thanks very much for giving me a clue about this. I promise I'll do my best not to blow myself up.

Andy (Vancouver, BC)

Yes, you can run a string of four RGB LEDs from a 12V power supply. They're odd little critters, though, and it's important to understand why this works as well as just the fact that it does. You can make electronic things that work by just blundering around with no understanding of what's really going on, but it really does pay to spend some time learning the basics of at least DC electronics before you start on any electronic project. Hence, this lecture.

In the four-RGB-LEDs-from-12V situation, the LEDs can be regarded like ordinary passive DC-circuit components, like resistors or batteries. But LEDs can't usually be treated that way. Two-leg 5mm RGB LEDs may look like the usual kind of LED, but they're actually three LED dies with a tiny controller circuit, all in a normal 5mm LED package.

If you make a string of simple resistors that all have the same value - let's say, five two-ohm resistors - and hook one end up to the positive terminal of your DC power supply and the other to the negative, a current will flow that's determined by the total resistance and the voltage, according to Ohm's Law: Voltage in volts equals current in amps multiplied by resistance in ohms, or V=IR.

(Ohm's Law is usually written with "I" as the symbol for current, rather than A-for-amps, because when Georg Ohm came up with the Law nobody really knew what current was, and it was referred to as "Intensity". Feel free to write it with an A if you like.)

If the power supply is outputting, let's say, 12 volts, a string of five two-ohm resistors in series will work out as follows:

12 = I*2*5
12 = I*10
12/10 = I
I = 1.2

So the current in this circuit would be 1.2 amps. Because the resistors all have the same resistance, each one "drops" the same voltage. If you measure the voltage "across" the central resistive element of one of the five resistors in this circuit, it'll be 2.4 (12/5) volts. Measure across two resistors and you'll see 4.8V, three will be 7.2V, et cetera. (If the resistors in the chain have different values, they'll drop different amounts of voltage, and dissipate different amounts of power, making you use a polynomial equation if you want to figure out which resistor's doing what.)

To visualise this, think of the current as a flow of water in a hose and each resistor as a narrowing, or kink, in the hose. The higher the resistance, the narrower the path for water flow, and the more pressure (voltage) you'd need to achieve a given flow rate (current). (I've got water analogies for capacitors and inductors, too!)

To really get a grip on all this, I highly recommend that you get a little "breadboard" that you can plug components into without soldering (this sort of thing), and a selection of jumper wires (like this, or you can of course make your own), alligator-clip leads, resistors, capacitors, inductors, LEDs, battery holders etc to play with. And destroy - blowing up resistors, caps and LEDs can be very educational. Wear eye protection, especially when playing with electrolytic capacitors:

A proper adjustable bench power supply would also be nice, but would cost way more than all of the rest of this stuff put together. A lantern battery or hacked-up plugpack or PC power supply would be an adequate substitute, for this elementary stuff.

(You'll also need a multimeter, of course. A $10 cheapie like this will be fine.)

The gold standard for basic electronic education is a "science kit" sort of setup, like the classic Gakken My Kit 150 and Electric Block EX-150. But, again, they're a bit expensive.

OK, back to LEDs. Ordinary LEDs do not behave like simple DC components; they don't just have a "resistance" where hooking them up to a given voltage will cause a given amount of current to pass. A blue or white LED might be specified "3.6V, 20mA", but if you connect it directly to a 3.6-volt power supply, it'll get warmer and warmer and pass more and more current - "thermal runaway" - until, if the power supply's internal resistance is low enough, the LED burns up. This will happen for series strings of LEDs as well; if you make a string of ten "1.8V 20mA" red LEDs and connect it to an 18V power supply, it will probably not last long.

(Power supplies that have high internal resistance are a special case; you can connect LEDs directly across such a power supply and they'll work fine. This is why Photon lights and "LED throwies" work; they connect an LED directly across a lithium coin-cell watch battery, but the battery's internal resistance keeps the LED safe.)

The simple solution to this, as I explain in my old piece about building a caselight, is to put a resistor in series with your LED or LEDs. It's easy to figure out what resistor values to use for a single LED or even an array, but again, doing this without understanding what you're doing is not a great idea.

Series and parallel are bedrock concepts, here, with direct application to a number of everyday situations. Take your question about the powerboard that delivers full mains voltage - in your case 117V, a nominal 230V where I live - to everything plugged into it. It does that because the powerboard's outlets, like the wall outlets in your house, are all in parallel. (There are some tricky things about household power wiring in some countries, but they need not detain us now.)

Now, consider the old-fashioned kind of Christmas lights, with a long string of little bulbs that all go out if one bulb blows, so you have to replace every bulb in turn with a fresh bulb until you find the one that's actually died. That sort of behaviour is a dead giveaway that you're dealing with devices wired in series. In the Christmas-lights case, they're a string of low-voltage bulbs whose total voltage adds up to mains voltage, and they "share" the voltage between them just like a string of resistors. If mains is 240V, twenty 12V bulbs in series will run from it happily.

(Mains power is, of course, alternating current, not direct current. The two are very different, but incandescent light-bulbs don't care.)

OK, now let's finally get to your specific application, adding trippiness to an electronic organ. If the organ is at all modern, it'll run from low-voltage DC inside, and contain a power supply that converts the AC mains to whatever voltages it requires, just like a computer PSU. This doesn't mean it's safe to go fiddling around in there while the organ is turned on, but it does mean that there's probably some supply rail you could easily use to power plenty of LEDs, since they don't draw much power.

You will probably have to fiddle with the organ's guts while it's powered up to find a suitable power rail (unless you've got a schematic or service manual, or the innards of the organ are unusually well-labelled), so all usual safety disclaimers go here, along with my traditional link to the Sci.Electronics.Repair FAQ. But I wouldn't be surprised if you could easily find a 12V-ish rail across which you could connect a string of RGB LEDs, or even multiple strings in parallel.

That last bit is a "series-parallel" array. If you've got 12V and want to run more than four 3V RGB LEDs, you make up multiple strings of four and connect them all in parallel. People often seem to find this concept a bit slippery, but it's another of the things that it's important to grasp if you're to know what you're doing.

Here's how I wired that LED caselight:

LED-array board layout

Those are 18 2-LED strings - and just one current-limiting resistor for the whole thing - all connected in parallel with each other. The little piece of "strip board" I used to make the caselight curls all of the copper traces around to make a rectangle and so is a bit confusing-looking, but electrically it's the same as two long wires, one positive and one negative, connected by 18 two-LED strings like the rungs of a ladder. (Rob Arnold's above-linked LED array wizard is very handy for figuring out LED array configurations, but remember that two-leg RGB LEDs aren't normal LEDs, so you really can just treat them as 3V DC components and not worry about resistors.)

If the organ doesn't turn out to have any tappable power rails, or if you just don't want to fool with them, the LEDs could less elegantly be run from a separate power supply, like a 12V DC plugpack. There's unexpected complexity waiting to ambush you here as well, though; if this page hasn't already turned you off electronics for life, try my essay on Humankind's Endless Quest for a Substitute Plugpack!